Like so many developers, I woke up one day with a great idea. The applications were endless, the creativity was flowing, and I was extremely motivated. Then, like many new developers, I opened up Visual Studio and thought now what?
This series is going to walk you through how I wrote my first API. I will share everything from resources, to missteps, to successes, and everything in between. Hopefully this will help someone else bring their ideas to life.
Let’s get started.
Day One:
I should start with talking about the motivation for writing this program.
I love dogs. Like really love dogs, and am a huge rescue advocate. Last weekend, my husband and I flew down to Atlanta (from Boston) and drove up with a 5 month old puppy that was going to be euthanized later that day. The reason we found out about this puppy was from a Facebook post my boss shared in the slack channel. This is often how rescues and potential fosters communicate, which seemed incredibly inefficient to me.
So, I started doing some research, and while I found several databases for people willing to transport, there was no real communication outside of someone having to reach out directly. It’s all unorganized and while the hearts are in the right place, I think there’s a much better way to be going about this.
The 20 hour drive from Georgia gave me plenty of time to think about how I could create something that would help shelters communicate more efficiently with each other and transport volunteers in the area. That brings us to the API. I will be writing a Web API with ASP.NET Core, Entity Framework, Razor Syntax, MVC, and Visual Studio that will create a platform for sharing open spaces in shelters, foster homes, and cars for transports.
Alright.
Let’s set up our project.
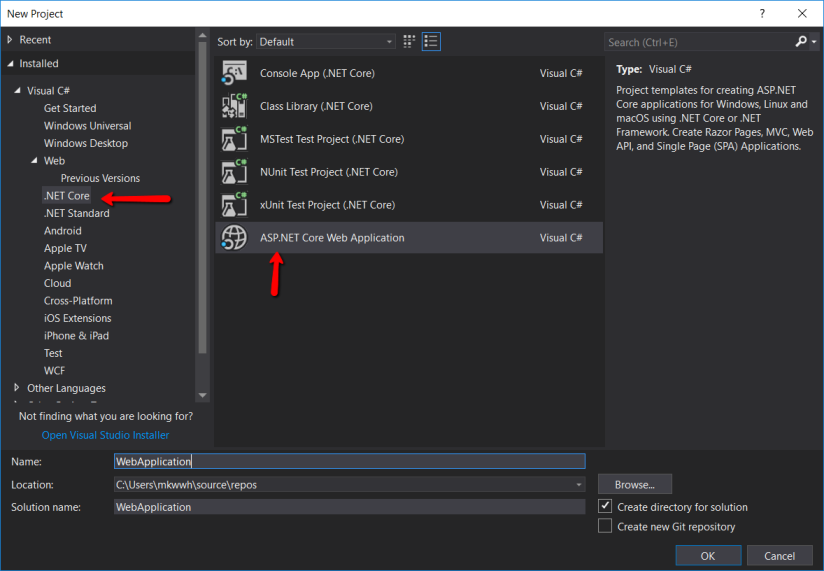
- Open Visual Studio and create a new project. I will be using Visual Studio 2017 but may switch sometime during this project to Visual Studio 2019 because it’s new and shiny and exciting.
-
We’re going to start with a new ASP.NET Core Web Application
You can read up more about .NET here.
On the next screen, we’re going select Web Application (Model-View-Controller) as our pre loaded project template. You of course can use the blank template if you prefer, but this takes out some of the grunt work.
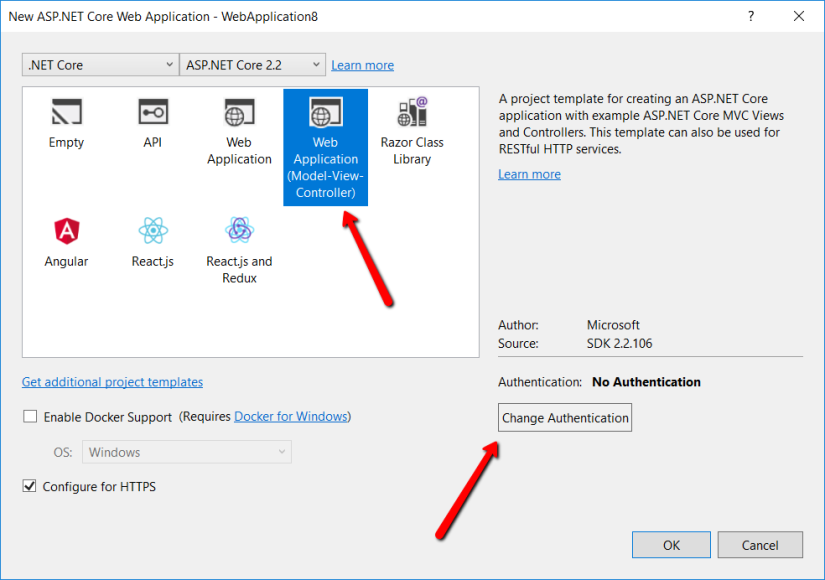
We’re also going to select the Change Authentication button. This will open up a prompt and should filled out with the following settings

By adding authentication, Visual Studio is going to load up Microsoft Identity that will allow us to safely create users without having to write any of the authentication algorithms ourselves.
We will be discussing Identity in later posts as we use it to build our web app but if you’re curious now, read up here
And now we have a project!
What’s next?
- NuGet Packages!
What the heck is NuGet Package?
TLDR: A NuGet Package is essentially a tool created and made publicly accessible by other developers so you don’t have to reinvent the wheel. We will use NuGet Packages for our frameworks and other useful tools.
You can read more deeply about NuGet Packages here.
Here is the list of NuGet Packages we will start out with (we may add more later):
Microsoft.AspNet.Mvc by Microsoft
Microsoft.AspNetCore.App by Microsoft
Microsoft.AspNetCore.Identity.EntityFrameworkCore by Microsoft
Microsoft.AspNetCore.Razor.Design by Microsoft
Microsoft.VisualStudio.Web.CodeGeneration.Design by Miscrosoft
Npgsql.EntityFrameworkCore.PostgreSQL by Shay Rojansky
We will go into more detail about what each of them do later but for now, how do we install these?
There are two ways:
First,
Visual Studio comes pre installed with a tool called “NuGet Package Manager” which does exactly what you would expect…manages NuGet Packages.
This can be accessed through Tools > NuGet Package Manager > Manage NuGet Packages for Solution…
It will look like this:
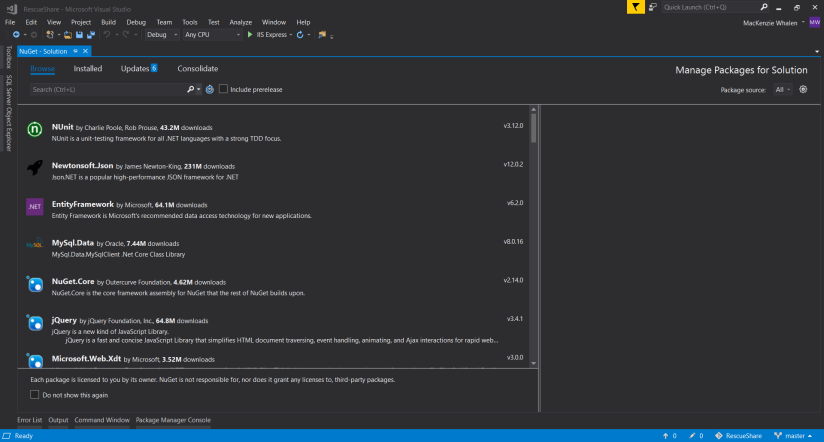
You can then browse, install, update, and delete packages for your solution.
Second,
The NuGet Package Manager also has a powershell pre-installed in Visual Studio where you can make all the same changes but with command line prompts. You can find a list of all the NuGet Package Powershell commands here.
Now we have a project with a bunch of pre-built tools. Great!
In Part II, we will venture into using Entity Framework to build our database.
All code for RescueShare can be found on my GitHub.

1 thought on “Basics of .NET Web Apps: Part 1 – Setting up your environment”